乱雑に保存された画像たちを供養!
はじめに
これはあくあたん工房お盆休みアドベントカレンダー6日目 (8月15日)の記事です.
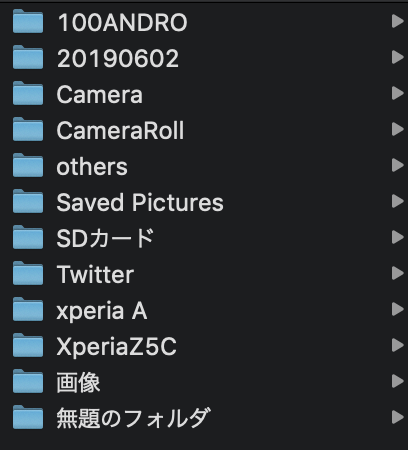
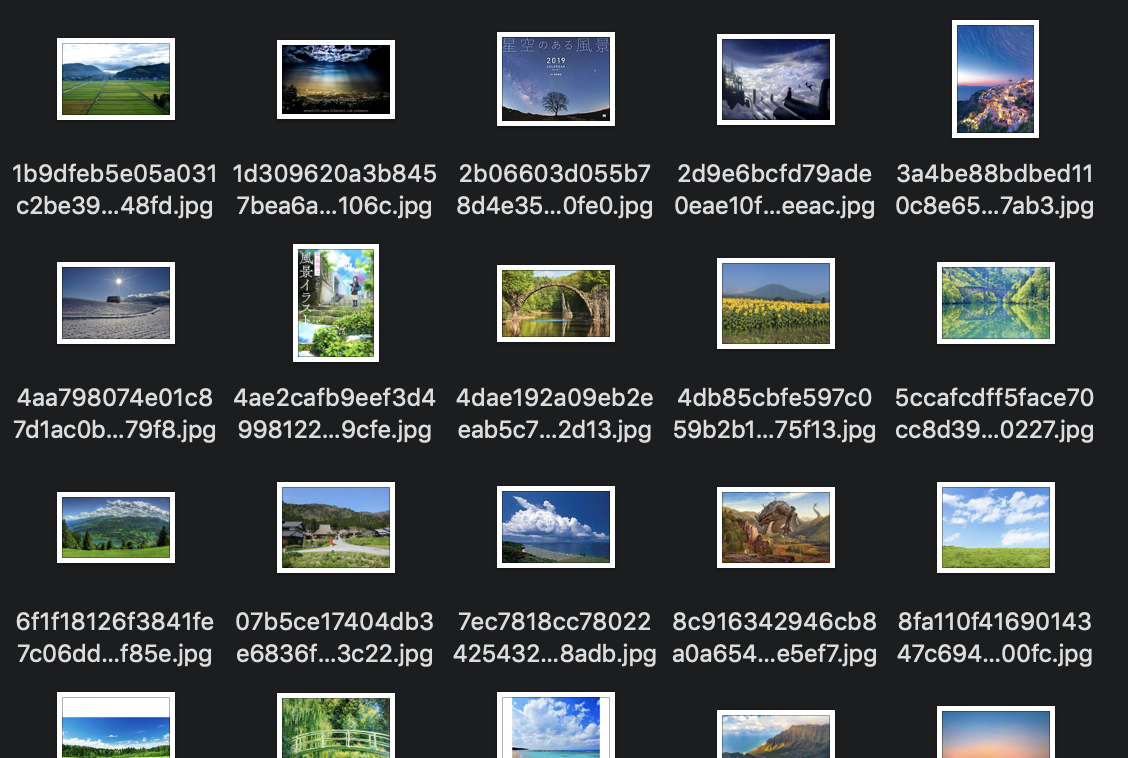
僕は今まで,外で撮った写真やネットで集めてきた可愛いイラストなどを,スマホに適当に保存して,スマホの買い替え時にPCに移していました.そのため,PCの画像フォルダは訳の分からないフォルダ名に全然別の種類の画像が乱雑に保存されている状況でした(まさに画像の墓場).このままでは画像たちが浮ばれませんが手動でフォルダ分けは辛い……

ということで機械学習の勉強も兼ねて乱雑な画像フォルダを分類してくれる分類機を作成したいと思います.(機械学習全く理解できてないので解説だとはお思わず,ツッコミを入れながら読んでください.)
↓こちらの記事を非常に参考にさせていただきました. qiita.com github.com
環境
- Google Colaboratory
- Chainer 5.4.0
手順
- 画像の準備
- 標準化
- 学習
- 分類・評価
僕の画像フォルダはほとんどが風景・犬(ラブラドール・レトリバー)・萌え画像のどれかなのでこの3パターンに分類したいと思います.
画像の準備
学習用の画像と評価用の画像を用意します.
学習用画像
「風景」,「ラブラドール 茶色」,「イラスト」をGoogleで検索してでてきた画像を使うことにしました.ガバガバ検索ワードですが全然違うの大丈夫だと信じました.スクレイピングの知識もないので参考記事にあるこちらのdownload.pyを使い,各画像96枚ずつ用意しました.これらの画像はGoogle Driveのtraining-dataフォルダ内に0~2のフォルダを作り,0から順に「風景」・「犬」・「萌え画像」のフォルダとして保存しました.
qiita.com


評価用画像
最終的には自分の画像全てを分類したいのですが,時間がかかるので僕の画像中から3つの種類をそれぞれ20枚を用意して分類させ,だいたいの正答率を調べたいと思います.こちらの画像はGoogle Drive内のtest-dataフォルダ内に学習用画像と同じように保存しました.
ちなみに画像フォルダには少なくとも2万5千枚の画像があるっぽいです.中学生の頃にくだらない面白画像とかをダウンロードしてたのを死ぬほど後悔してます(消したいけど他の画像と混ざってて面倒).
標準化
まずは,GoogleDriveをColaboratoryにマウントします.
from google.colab import drive
drive.mount('/content/drive')
次に,データを読み込んで,そのままでは解像度もバラバラなので64x64にリサイズしました.最初はChainerのLabeledImageDatasetクラスを使ってリサイズしようとしてたんですが,上手くいかなかったため,参考記事の通りOpenCVで行いました.
import numpy as np
import cv2
import os

# 分類
words = ["風景", "犬", "萌え画像"]

# データフォルダ名
training_folder_name = "drive/My Drive/training-data/"
test_folder_name = "drive/My Drive/test-data/"

# wordsに対する辞書を作成
detection_words = {}
for i in range(len(words)):
    detection_words[words[i]] = i

# 学習用データ
x_train = []
# 学習用ラベル
t_train = []
# テスト用データ
x_test = []
# テスト用ラベル
t_test = []

# 学習用データとラベルを準備
for word in detection_words:
    path = training_folder_name + '/' + str(detection_words[word])
    imgList = os.listdir(path)
    img_num = len(imgList)
    for j in range(img_num):
        imgSrc = cv2.imread(path + "/" + imgList[j])
        if imgSrc is None: continue

        # 画像を64x64にリサイズ
        imgSrc = cv2.resize(imgSrc, (64, 64))
        x_train.append(imgSrc)
        t_train.append(detection_words[word])

# テスト用データとラベルを準備
for word in detection_words:
    path = test_folder_name + '/' + str(detection_words[word])
    imgList = os.listdir(path)
    img_num = len(imgList)
    for j in range(img_num):
        imgSrc = cv2.imread(path + "/" + imgList[j])
        if imgSrc is None: continue

        # 画像を64x64にリサイズ
        imgSrc = cv2.resize(imgSrc, (64, 64))
        x_test.append(imgSrc)
        t_test.append(detection_words[word])

# データは1/255して値を0~1にする
x_train = np.array(x_train).astype(np.float32).reshape((len(x_train), 3, 64, 64)) / 255
t_train = np.array(t_train).astype(np.int32)
x_test = np.array(x_test).astype(np.float32).reshape((len(x_test), 3, 64, 64)) / 255
t_test = np.array(t_test).astype(np.int32)
学習用ネットワーク
2層の畳み込み層+3層の全結合層です.画像には畳み込みが効くそうです.
import chainer.links as L
import chainer.functions as F
from chainer import Chain


# モデル
class CNN(Chain):
    def __init__(self):
        super(CNN, self).__init__(
            # 畳み込み層
            conv1=L.Convolution2D(None, 20, 5),
            conv2=L.Convolution2D(None, 50, 5),
            # 全結合層
            l1=L.Linear(None, 500),
            l2=L.Linear(None, 500),
            l3=L.Linear(None, len(detection_words), initialW=np.zeros((len(detection_words), 500), dtype=np.float32))
        )

    def forward(self, x):
        h = F.max_pooling_2d(F.relu(self.conv1(x)), 2)
        h = F.max_pooling_2d(F.relu(self.conv2(h)), 2)
        h = F.relu(self.l1(h))
        h = F.relu(self.l2(h))
        h = self.l3(h)
        return h
学習
最適化関数にAdamというのを使い,エポック数を30,バッチサイズを15とし
from chainer import optimizers

model = CNN()
# 最適化関数
optimizer = optimizers.Adam()
optimizer.setup(model)

n_epoch = 30
batch_size = 15
N = len(t_train)

# accuracyとlossの推移をみるために用意
accuracy_histry = []
loss_histry = []
各種設定を終えたら次のコードで学習が始まります.
from chainer import Variable

for epoch in range(n_epoch):
    # train
    sum_loss = 0
    sum_accuracy = 0

    perm = np.random.permutation(N)
    for i in range(0, N, batch_size):
        x = Variable(x_train[perm[i:i + batch_size]])
        t = Variable(t_train[perm[i:i + batch_size]])
        y = model.forward(x)
        model.zerograds()
        loss = F.softmax_cross_entropy(y, t)
        acc = F.accuracy(y, t)
        loss.backward()
        optimizer.update()
        sum_loss += loss.data * batch_size
        sum_accuracy += acc.data * batch_size
    accuracy_histry.append(sum_accuracy / N)
    loss_histry.append(sum_loss / N)
    print("epoch: {}, mean loss: {}, mean accuracy: {}".format(epoch, sum_loss / N, sum_accuracy / N))
分類・評価
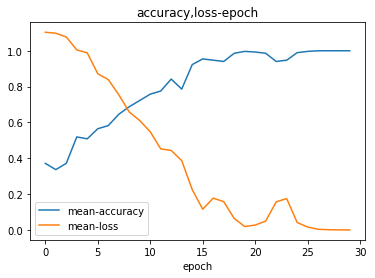
import matplotlib.pylab as plt

# グラフ化
X_axis = np.arange(n_epoch)
plt.plot(X_axis, accuracy_histry, label="mean-accuracy")
plt.plot(X_axis, loss_histry, label="mean-loss")
plt.xlabel("epoch")
plt.title("accuracy,loss-epoch")
plt.legend()
plt.show()

cnt = 0
testsize = len(t_test)
count = {}
for i in range(testsize):
    x = Variable(np.array([x_test[i]], dtype=np.float32))
    t = t_test[i]
    y = model.forward(x)
    y = np.argmax(y.data[0])

    try:
        count[t]
    except:
        count[t] = [0, 0]
    if t == y:
        cnt += 1
        # それぞれのラベルの正解数をカウント
        count[t][0] += 1
    # それぞれのラベルの合計数をカウント
    count[t][1] += 1
    # print(t,y)
print("accuracy: {}".format(cnt / testsize))
# それぞれのラベルの正解数
for i in count:
    for word in detection_words:
        if detection_words[word] == i:
            print(
                "{}の正当数:{}、誤答数{}、正解率{}".format(word, count[i][0], count[i][1] - count[i][0], count[i][0] / count[i][1]))
出力は次のようになりました.

accuracy: 0.6333333333333333
風景の正当数:10、誤答数10、正解率0.5
犬の正当数:16、誤答数4、正解率0.8
萌え画像の正当数:12、誤答数8、正解率0.6
感想
こんな精度では画像たちが報われない!今後も地縛霊のごとくHDDに残っていくことでしょう.
いろいろ頑張ろうと思ってたのですが,最終的に分からないところが多すぎて参考の記事からコードをそのまま使わせてもらうことが多くなってしまいました.
やはり機械学習は難しい……
これからもっと精進して来年には悪霊,もとい画像フォルダを供養したいと思います.